This page describes how to use UTokyo VPN on Windows devices.
To use UTokyo VPN, you must enable Multi-Factor Authentication in your UTokyo Account. In addition, you are required to have completed the Information Security Education at the specified time. Please refer to the UTokyo VPN home page for details, and then follow the steps below.
Preparation: Download and Install the VPN Client Application.
Install the application “Cisco Secure Client” on your device to connect to UTokyo VPN.
Step A: Go to https://vpn1.adm.u-tokyo.ac.jp/. Unless you have already signed in, the UTokyo Account sign-in page will appear. Sign in with your UTokyo Account.
Help: When the error message “You don’t have access to this” (Error Code: 53003) appears
It is possible that the setup or activation of the multi-factor authentication (MFA) for your UTokyo Account, which is required to use UTokyo VPN, has not yet been completed. Please make sure to follow the initial setup procedure on the page, “Initial Setup Procedures for Multi-Factor Authentication for UTokyo Accounts” until the last step, “Step 4: Apply for MFA Use” to enable multi-factor authentication for your UTokyo Account. It will take about 30 minutes for the MFA settings to be reflected in the system after these procedures, so please wait for a while.
If the issue is still not resolved, please consult the Technical Support Desk.
Troubleshooting guide: When the error message “申し訳ありませんが、サインイン中に問題が発生しました” or “Sorry, but we’re having trouble signing you in.” appears
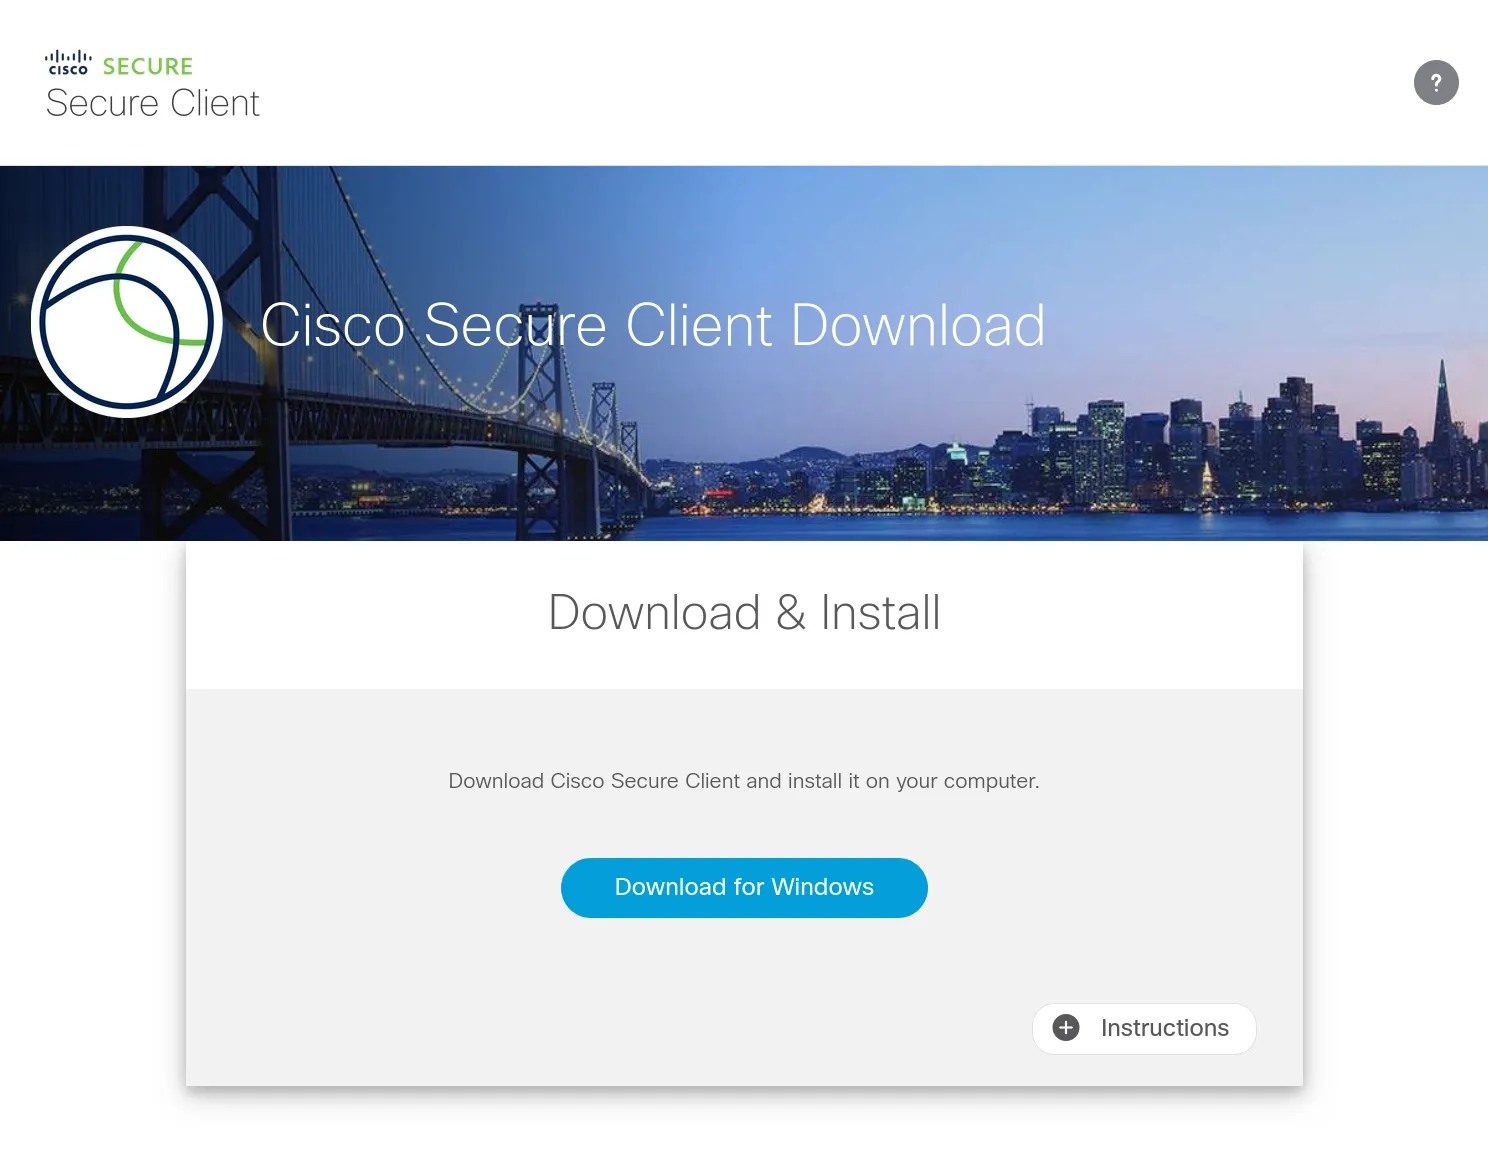
There is a possibility that you have not passed the information security education confirmation test, which is required to use UTokyo VPN. Please check the page for the Information Security Education, and complete and pass the confirmation test. Once you pass the test, the results will be immediately reflected in the system.Step B: After the sign-in, a download page for the Cisco Secure Client application, as illustrated below, will appear. Click “Download for Windows” to download the client application.
Troubleshooting guide: When the download page does not appear and a blank page is displayed
Please access this page and try downloading.After these steps, install the application as you would do for any other Windows application.
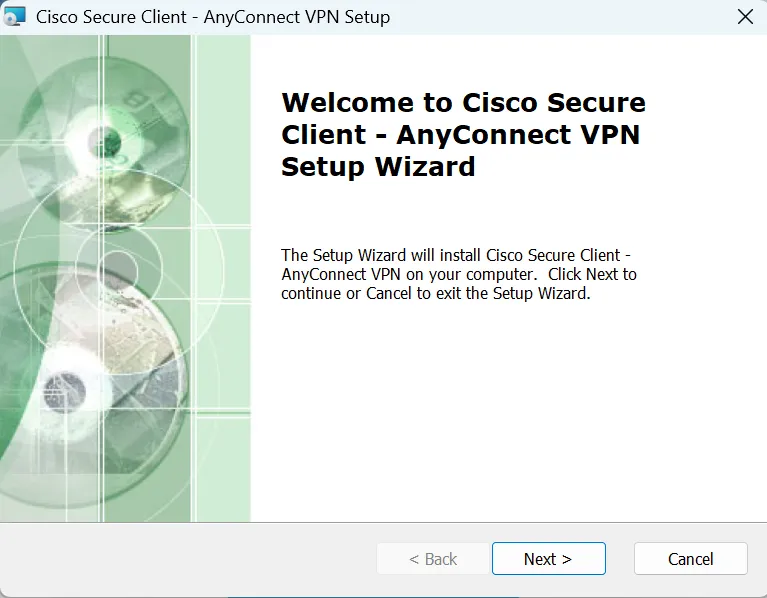
Step C: Follow the setup wizard screens below to proceed with the installation. In the End User License Agreement, please review the terms, select “I accept the terms in the License Agreement” and click “Next” to proceed.

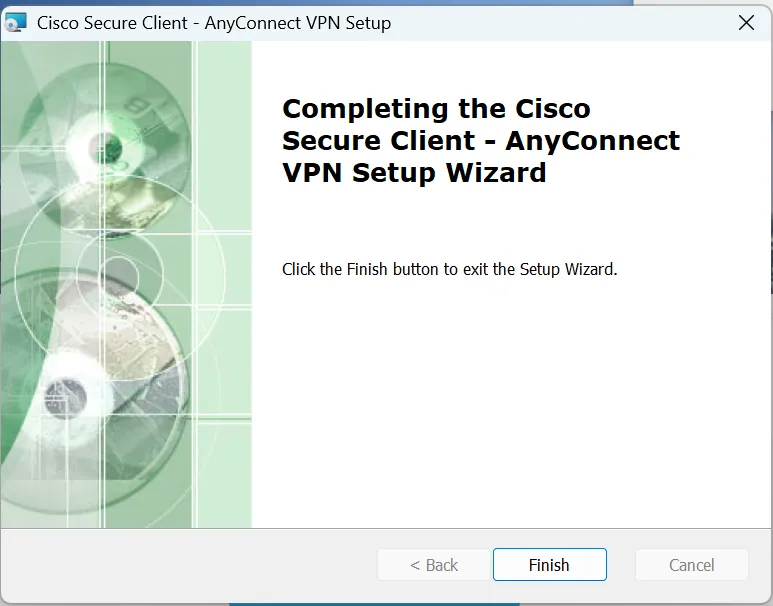
Step D: If the installation was completed successfully, the VPN client application “Cisco Secure Client” is added to the application.

You are now ready to use VPN.
Steps to connect to the UTokyo VPN
The following steps are required, every time to use the VPN. Please note that your device will not connect automatically to the VPN immediately after booting your PC.
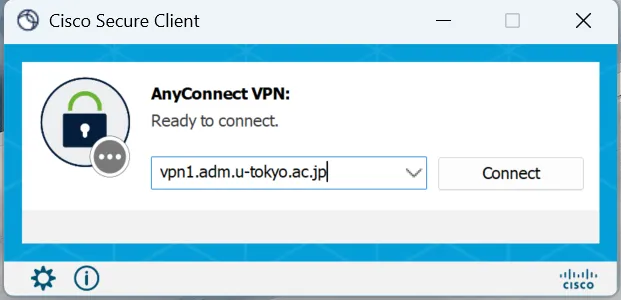
Step E: After launching the “Cisco Secure Client” installed following the Preparation steps, the window illustrated below will appear. Enter vpn1.adm.u-tokyo.ac.jp as the VPN server. Click the “Connect” button.
Step F: After clicking the “Connect” button, unless you have already signed in, the UTokyo Account sign-in page will appear. Sign in with your UTokyo Account.
Troubleshooting guide: When the error message "AnyConnect profile settings mandate a single local user, but multiple local users are currently logged into your computer. A VPN connection will not be established" appears
It is possible that multiple users are simultaneously logged in on the device that is trying to connect to the UTokyo VPN, please log off all the users except the user connecting to the VPN.Help: When the error message “You don’t have access to this” (Error Code: 53003) appears
It is possible that the setup or activation of the multi-factor authentication (MFA) for your UTokyo Account, which is required to use UTokyo VPN, has not yet been completed. Please make sure to follow the initial setup procedure on the page, “Initial Setup Procedures for Multi-Factor Authentication for UTokyo Accounts” until the last step, “Step 4: Apply for MFA Use” to enable multi-factor authentication for your UTokyo Account. It will take about 30 minutes for the MFA settings to be reflected in the system after these procedures, so please wait for a while.
If the issue is still not resolved, please consult the Technical Support Desk.
Troubleshooting guide: When the error message “申し訳ありませんが、サインイン中に問題が発生しました” or “Sorry, but we’re having trouble signing you in.” appears
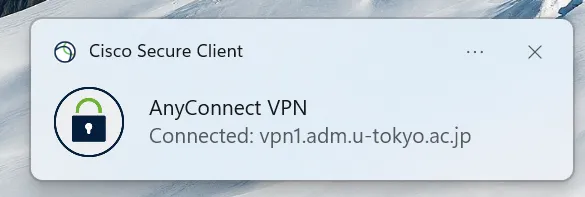
There is a possibility that you have not passed the information security education confirmation test, which is required to use UTokyo VPN. Please check the page for the Information Security Education, and complete and pass the confirmation test. Once you pass the test, the results will be immediately reflected in the system.Step G: If the window displaying “Connected: vpn1.adm.u-tokyo.ac.jp” appears as illustrated below, your device is connected to the VPN. Except for some communication platforms such as Zoom and Webex that do not require a VPN connection and e-journal sites, all communications occur via this VPN, connecting to UTokyo campus network.
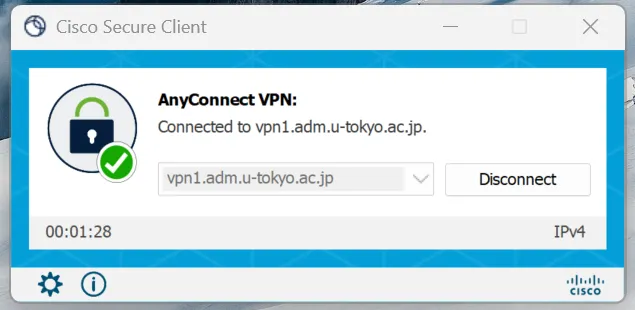
Step H: To view the current connection status, click on the “Cisco Secure Client” icon again. If the window displaying “Connected to vpn1.adm.u-tokyo.ac.jp.” illustrated below appears, your device is connected to UTokyo VPN.
To disconnect from the VPN, click the “Disconnect” button in this window.