This page describes the procedures to change the settings of your verification methods (authentication apps, phone number, etc.).
If the verification method you registered will become unavailable due to changing your phone model, etc., please make sure to add an alternative verification method BEFORE the former verification method is disabled. Once your old phone is disposed of, you will no longer be able to verify your identity with the authentication app using the old phone, and if you changed the phone number, verification with your phone number will also be impossible. Since the MFA process is necessary even when changing your verification method, it is crucial that you change your settings in advance to avoid getting completely locked out of your UTokyo Account.
Registered verification method can be changed from the Security info page.
Adding Verification Methods
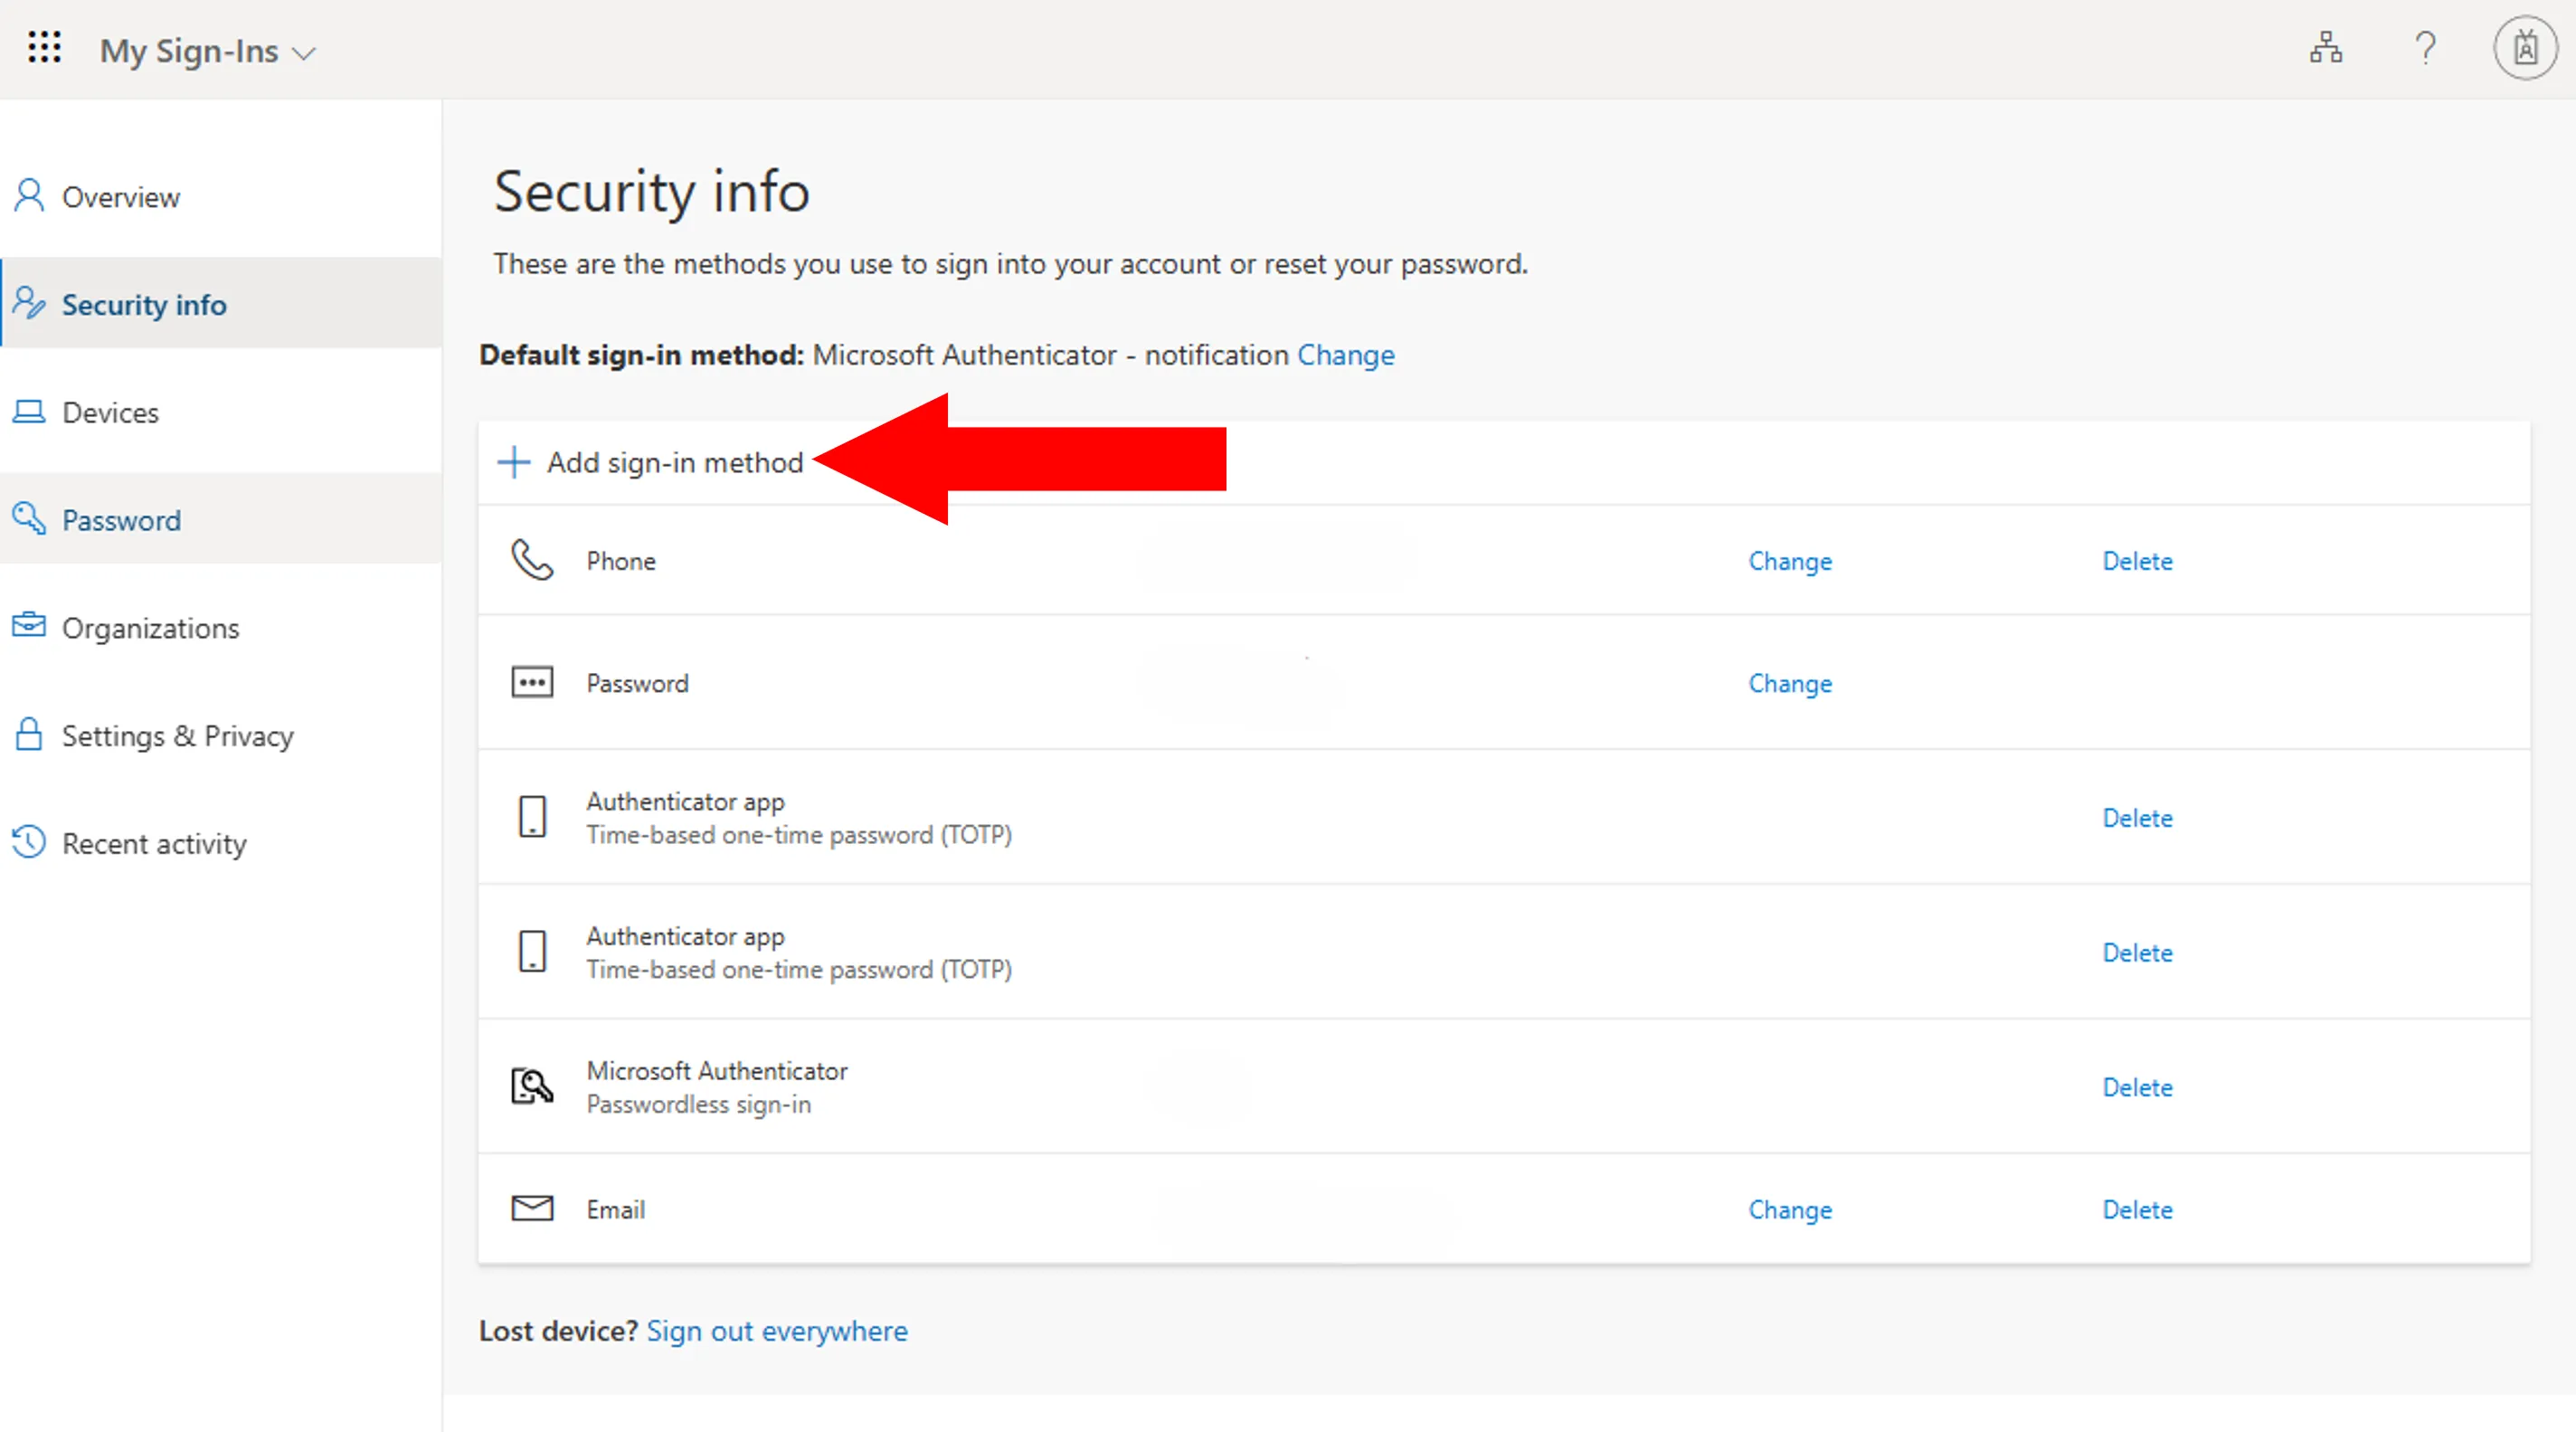
In the Security info page, you can add verification methods by following the procedures given in “Step 2: Add Alternative Verification Methods” in the “Initial Setup Procedures for Multi-Factor Authentication for UTokyo Accounts” page.
Changing the Default Sign-in Method
One of your verification methods (usually the first method added) will become your “default sign-in method”. When you sign in, the system will automatically choose the default sign-in method as your verification method. The default sign-in method can be changed by following the steps below.
- Find “Default sign-in method:” on the Security info page.
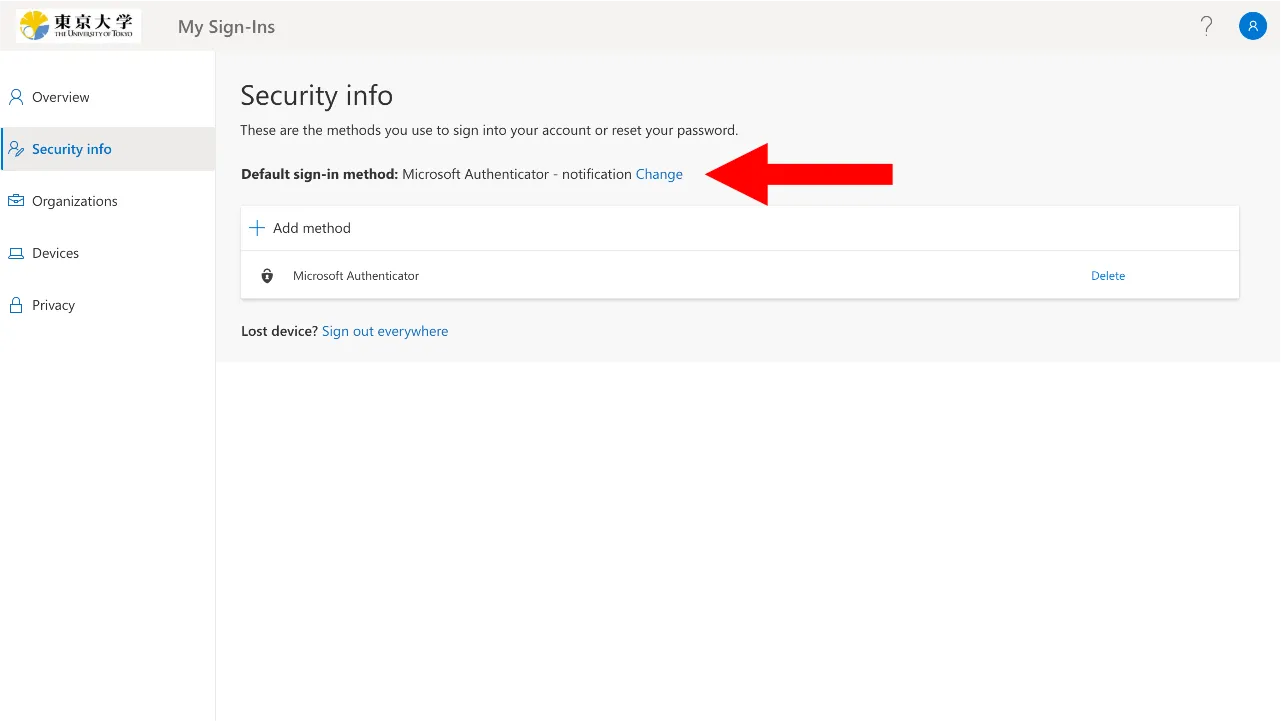
- Click “Change” on the right of the default sign-in method.
- For “Which method would you like to use to sign in?”, select the verification method you wish to use, and click “Confirm”.
Editing Verification Methods
The verification methods, “Phone”, “Alternate phone”, and “Office phone” can be edited by following the steps below.
- Find the verification method you wish to edit in the list of verification methods on the Security info page, and click “Change” on the right of the method.

- Enter your new phone number in the popup screen and click “Next”.
- Verify your phone number (via text or call). Follow the same procedure as when adding a new phone number.
Note that authenticator apps, such as Microsoft Authenticator and Google Authenticator, do not have a “Change” screen. If you wish to change the settings of an authenticator app, add a new authenticator app with new settings and then delete the old authenticator app.
Deleting Verification Methods
Please follow the steps below to delete verification methods you no longer wish to use.
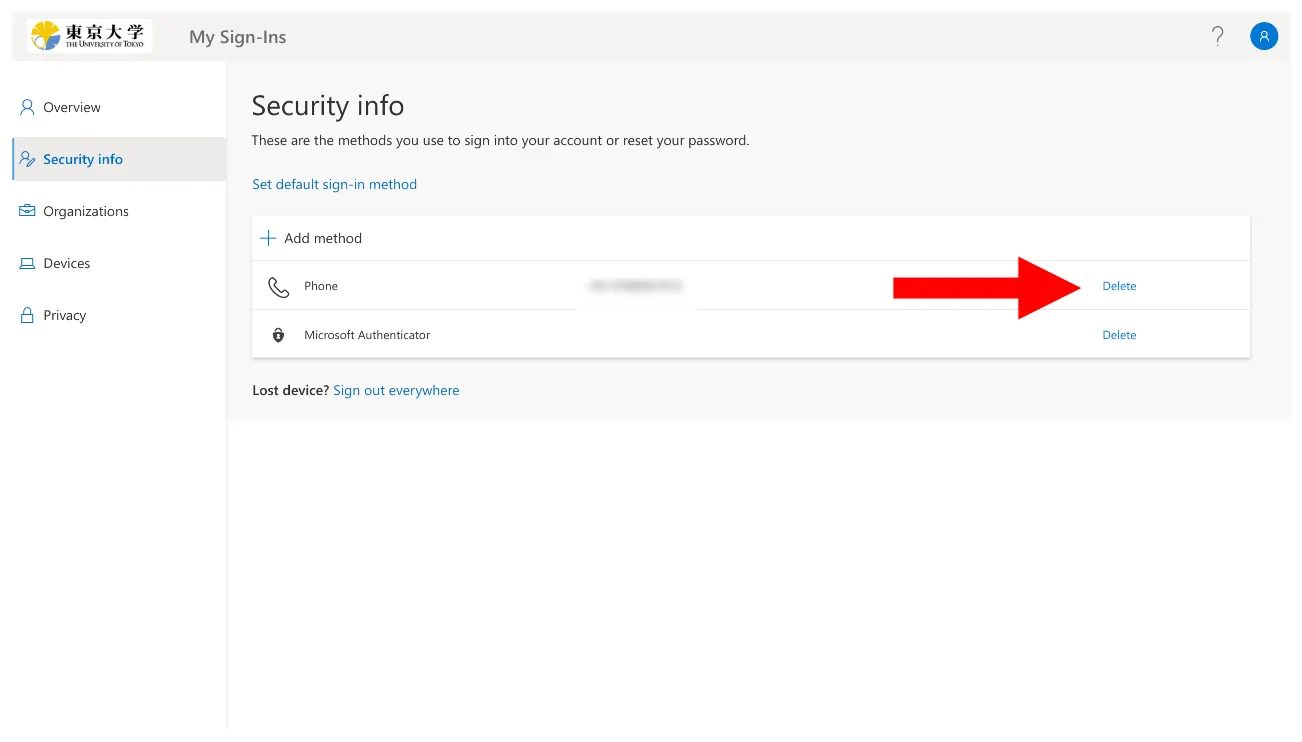
- Find the method you wish to edit in the list of verification methods on the Security info page, and click “Delete” on the right of it.
- When “Are you sure you would like to delete this method for your account?” is displayed, click “Yes”.
Note that if you delete all the verification methods (i.e. all authenticator apps and phones) on the list, you will be prompted to go through the initial setup procedure upon the next sign-in. (Even if “Email” and “App password” are left in the list, they do not work as verification methods.)