About Support request
If you have any questions about the technical aspects of any Microsoft Azure service, please use the support request form.
The content and image on this page is an excerpt from Microsoft Learn. For more information, see Create Support request and Manage an Azure support request on Microsoft Learn.
Conditions for creating a support request
Only owner role accounts for subscription can request this.
Only in the following cases:
- About Subscriptions
- Cancelled subscriptions cannot be requested to be reinstated.
- About VM Quote
- About Service Price
- For billing inquiries, You must be contact the UTokyo Azure support staff.
1. Open a support request from the global header
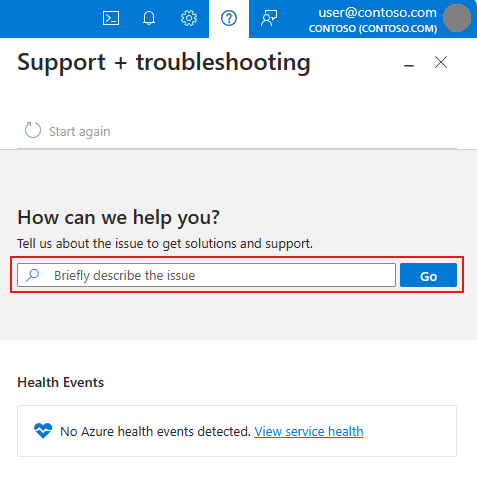
- Select the ? in the global header, then enter a few words to describe your issue.

- Follow the prompts to share more details about your issue, including the specific resource, if applicable. We’ll look for solutions that might help you resolve the issue.
- If none of the solutions resolve the problem you’re having, select
Create a support request.

2. Open a support request from a resource menu
To start a support request in the context of the resource you’re currently working with:
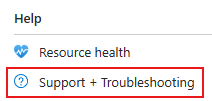
- From the resource menu, in the Help section, select
Support + Troubleshooting.

- Follow the prompts to share more details about your issue. Some options may be preselected for you, based on the resource you were viewing when you selected
Support + Troubleshooting. We’ll look for solutions that might help you resolve the issue.
If none of the solutions resolve the problem you’re having, select Create a support request.
3. Create a support request
When you create a new support request, you’ll need to provide some information to help us understand the problem. This information is gathered in a few separate sections.
Problem description
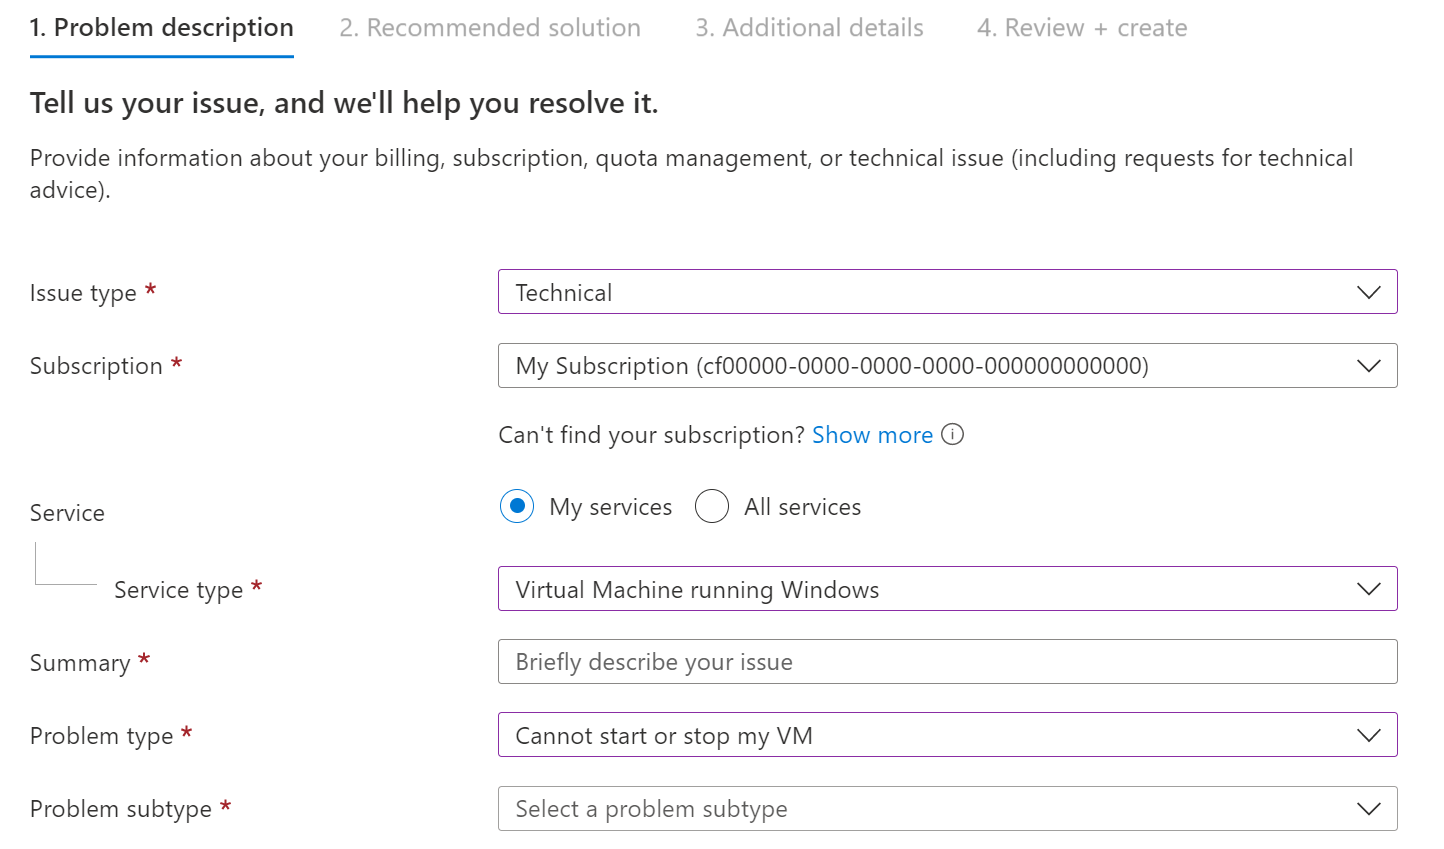
The first step of the support request process is to select an issue type. You’ll be prompted for more information, which can vary depending on what type of issue you selected. If you select Technical, specify the service that your issue relates to. Depending on the service, you might see options for Problem type and Problem subtype. Be sure to select the service (and problem type/subtype if applicable) that is most related to your issue. Selecting an unrelated service may result in delays in addressing your support request.

After you provide all of the requested information, select Next.
Recommended solution
Based on the information you provided, we provide some recommended solutions that might be able to fix the problem. In some cases, we may even run a quick diagnostic check. These solutions are written by Azure engineers to solve most common problems.
If you’re still unable to resolve the issue, continue creating your support request by selecting Return to support request, then selecting Next.
Additional details
Next, we collect more details about the problem. Providing thorough and detailed information in this step helps us route your support request to the right engineer.
- Complete the
Problem detailsso that we have more information about your issue. If possible, tell us when the problem started and any steps to reproduce it. You can optionally upload one file (or a compressed file such as .zip that contains multiple files), such as a log file or browser trace. For more information on file uploads, see File upload guidelines. - In the Advanced diagnostic information section, select
YesorNo. SelectingYesallows Azure support to gather advanced diagnostic information from your Azure resources. If you prefer not to share this information, selectNo. For details about the types of files we might collect, see Advanced diagnostic information logs.
- In some cases, you may see additional options. For example, for certain types of Virtual Machine problem types, you can choose whether to allow access to a virtual machine’s memory.
- In the Support method section, select the
Support plan, theSeverity level, depending on the business impact. The maximum available severity level and time to respond depends on your support plan and the country/region in which you’re located, including the timing of business hours in that country/region. - Provide your preferred contact method, your availability, and your preferred support language. Confirm that your country/region setting is accurate, as this setting affects the business hours in which a support engineer can work on your request.
- Complete the Contact info section so that we know how to reach you.
Select Next after you finish entering this information.
4. Review + create
Before you create your request, review all of the details that you’ll send to support. You can select Previous to return to any tab if you want to make changes. When you’re satisfied that the support request is complete, select Create.
A support engineer will contact you using the method you indicated. For information about initial response times, see Support scope and responsiveness.
5. Manage an Azure support request
View support requests
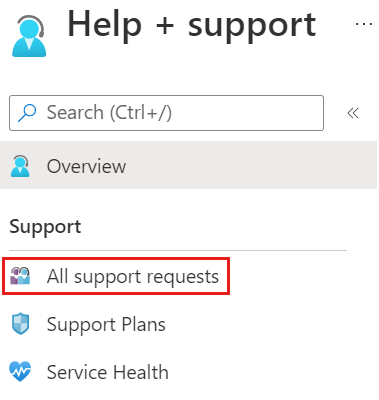
View the details and status of support requests by going to Help + support > All support requests in the Azure portal.

You can search, filter, and sort support requests. By default, you might only see recent open requests. Change the filter options to select a longer period of time or to include support requests that were closed.
To view details about a support request to view details, including its severity and any messages associated with the request, select it from the list.