If you want to share subscriptions or resources (scopes) with laboratory members or collaborators, the representative must apply for the subscription and add the collaborators to the subscription with appropriate roles. At that time, what the sharer can do depends on which scope and role they are assigned to.
- Reference: Add an owner (April 18, 2025:Information Session Slide)
Recommended role assignments
| User | Share | Scope | Role |
|---|---|---|---|
| Faculty | Transfer your subscription | Subscription | Owner |
| For Faculty | Delegate expense and user management | Subscription | Owner |
| For Faculty | Not Delegate expense and user management | Subscription | Contributor |
| For Student | Delegate the creation of new resources | Subscription | Contributor |
| For Student | Not Delegate the creation of new resources | Resource | Contributor |
| Both | Use only deployed services | (Deployed services) | (Separate management permissions granted for services) |
Difference between an Owner and a Contributor
Both the Owner and Contributor have what are administrator privileges, but there are the following differences:
- Owner:
- (Only if assigned to a subscription) You can view the Free tier, Guaranteed free tier, current usage, etc. on the subscription management page on the UTokyo Azure New application page.
- You can assign a shared member role to a subscription, resource group, etc.
- Contributor:
- Other than the two privileges mentioned above, the user has the same privileges as the owner.
Role assignment steps
Follow the steps below to assign roles to each scope. We will show the steps for Contributor here, but the steps are the same for Owner (with some additional steps), so please read them accordingly when assigning owners.
1.The Azure Portal, click the Subscription or Resource for which you want to grant privilege.
2.Click Access Control (IAM) from the list on the left side of the screen.
3.Click +Add from the options displayed at the top of the main screen and select Add role assignment.
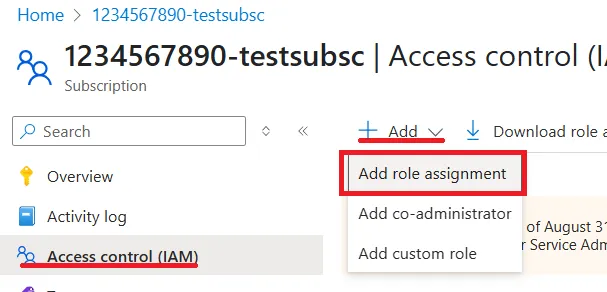
4.Please set each section below in order.
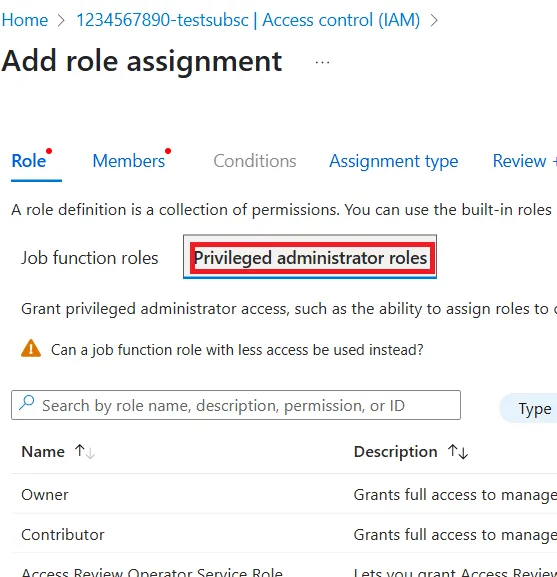
- Role Section
- There are two options,
Job Function RoleandPrivileged Administrator Role, so selectPrivileged Administrator Role. - A list of selectable roles will be displayed at the bottom of the screen, so click Contributor.
- If the cell background turns grey, it is selected.
- There are two options,
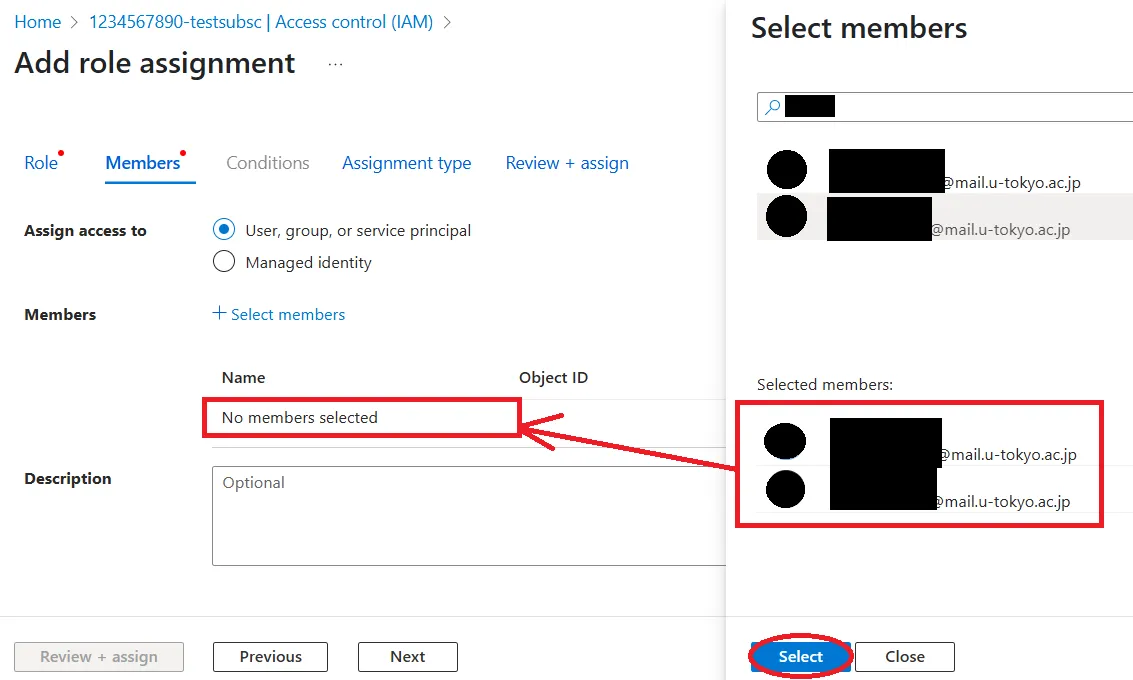
- Members section
- Selected role:Make sure this is the role you selected in the Role section.
- Assign access to:Select
User, group or service principal. - Members:Click
+ Select Members, and a search and selection screen for the accounts to which you want to grant permissions will appear on the right side of the screen. Narrow your search criteria to find and select the accounts to which you want to grant permissions. Finally, clickSelectat the bottom of the selection screen, and the selected members will be displayed on the main screen. - Description:Please add a description if necessary.
Help: Can’t find the account I want to select
The user must have a UTokyo Account. The search string can be a name or email address registered to a UTokyo Account. Please make sure the search string is correct. Alternatively, if the user may not yet have a UTokyo Account, please ask the user to check their UTokyo Account registration status.
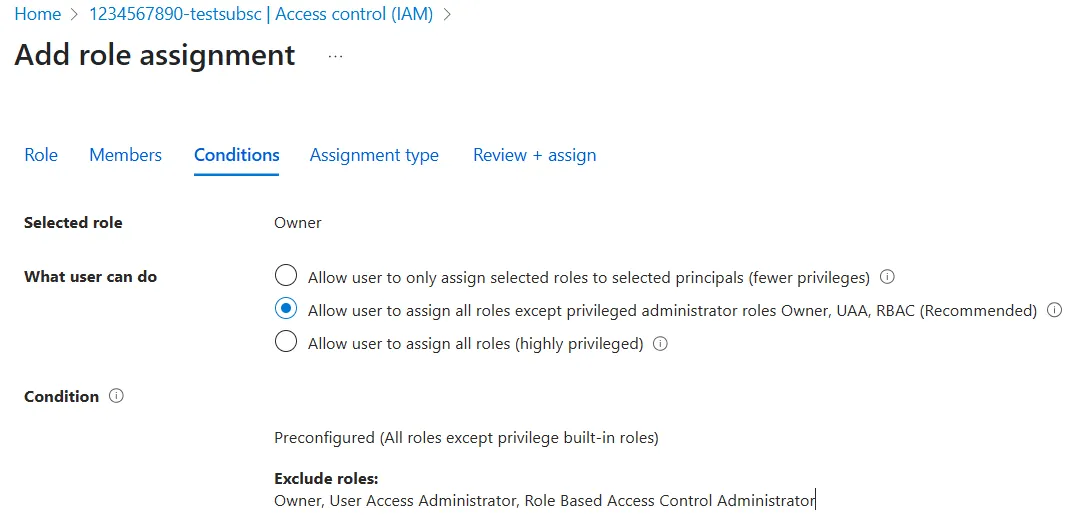
- (Owner role step only) Conditions section
- What user can do:
- Typically you would select
Allow user to assign all roles except privileged administrator roles Owner, UAA, RBAC (Recommended). - Select
Allow user to assign all roles (highly privileged)only if you are transferring the subscription to the other person.
- Typically you would select
- What user can do:
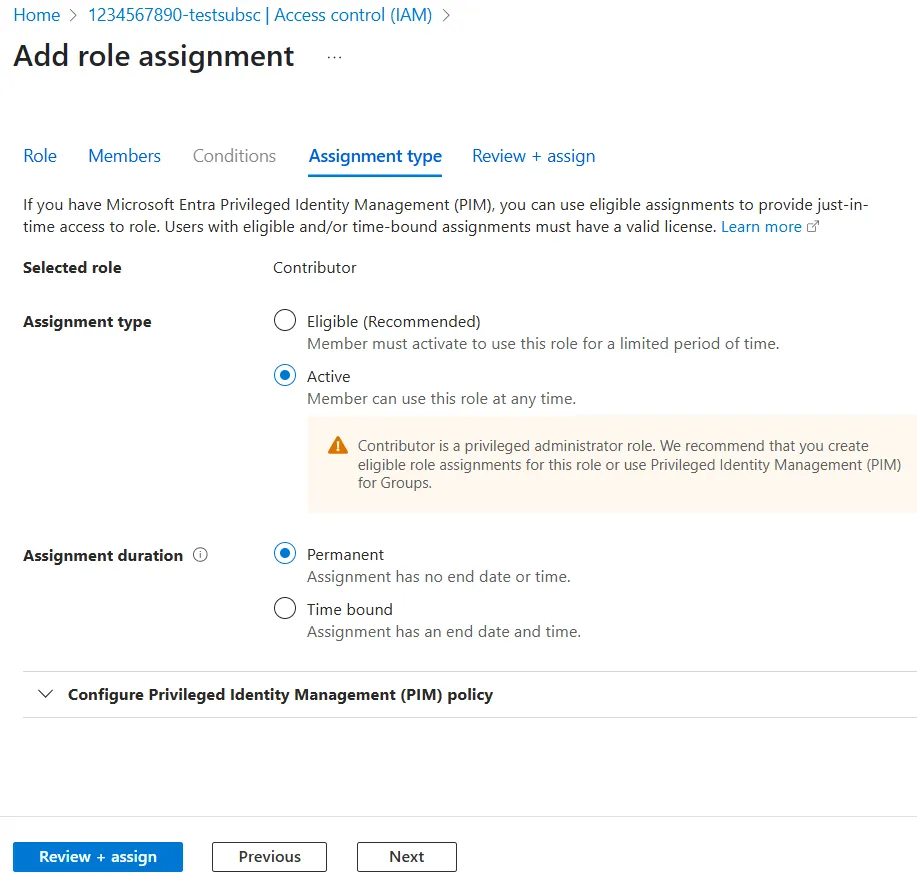
- Assignment type section
- Selected role:Make sure this is the role you selected in the Role section.
- Assignment type:Please select
Active. Do not selectTarget. - Assignment Duration:Please select
Permanent. Do not selectTime bound.
- Review + assign section
- Check the contents and if they are correct, click
Review + assignat the bottom of the screen.
- Check the contents and if they are correct, click
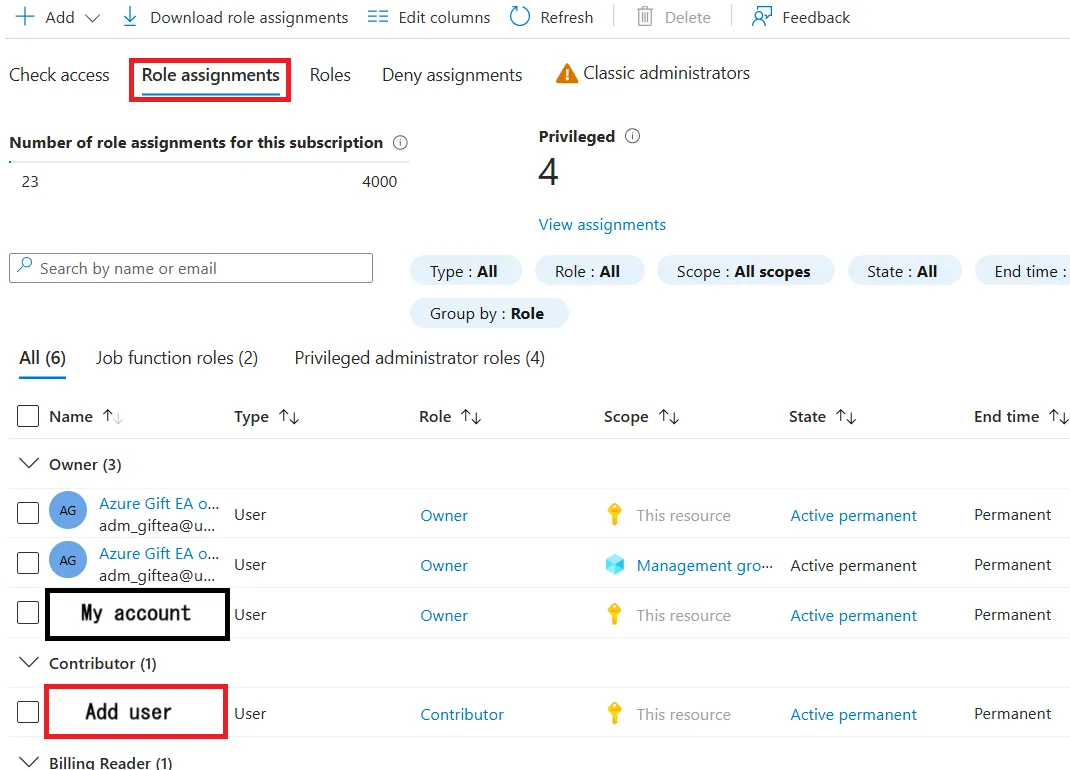
5.Verify that permissions are granted correctly.
- Please repeat the procedure from the beginning to step 2 and click on the
Role assignmentstab. - Make sure that the members you are added with the correct roles.